Shared Community Place PC server
Alpha Test Release
You should be familiar with the basic operation
of the Community Place browser, and you should have connected to one
of the Sony shared worlds to get a feeling for what it's all about.
You don't need to worry about this server if you just want to use
the shared worlds that Sony, or some other third party have
created. These shared worlds will connect to publically accessible
servers that we at Sony run or 3rd parties have run.
The Win95 server: what's it about
This server will allow you to share VRML1.0 and VRML2.0 worlds using the Community Place VRML2.0 browser. Sharing a world is simple, you need to add one line to an existing VRML1.0 or VRML2.0 world file which will tell the Community Place browser where the world server is.You then run the server on a PC of your choice and anybody loading the VRML1.0 or VRML2.0 file into a Community Place browser will be automatically connected to the shared world.
When connected, users can see other users, use a simple chat facility to talk to each other and, if you set it up, expresses a little emotion with our avatar action panels.
So why are we telling you this here? Because the use of a Community Place bureau server running on your PC will not only allow you to share scenes, but it will allow you to share behaviours as well ! Sounds fun, it is; shared animation, games, collaborative tools and a host of other 3D idea are are trivial to build if you want to.
Download the server
Try downloading the server if you want.- You can download a Community Place Bureau from HERE.
- If you have the server, go to How do I use it.
How do I use it
There are two parts, running the server and connecting a client.Running the server
The Win95 server is a simple Community Place Bureau server that runs under Windows95. You simple download it and run it. The server has a simple menu bar allowing you to control it. When first started it is in the stopped state. Pull down the view menu and "check" the status option. A small status window will be displayed with information about the server status, i.e. stopped or running, connected users, and the port the server is listening on.The server starts up at a well known TCP port (5126). To change this, pull down the options menu bar and select port. You will be prompted for a new port. Choose any port number greater than 5000. If you are unsure which port to use, leave it at the default value.
Next, pull down the run menu and select run, the server will now start listening for connections at the port specified. In the status window, the status will change to running.
The server is now waiting for Community Place browsers to connect. When they connect the server handles everything, it tracks a users location and their avatar, telling other browsers about them, it passes chat messages, and it handles everything needed to support shared behaviours.
The status window will also be updated to show any connections. Its a good idea to leave the status window open to see who is connected and if the server is running OK.
Connecting to the server
To connect to a server you need to do two things, tell the browser to connect by adding an info node to your VRML file and provide an avatar so that people can see each other.
Adding the server information to the VRML file
This information is read in by the Community Place browser when it loads your VRML file. It consists simply of the address of the machine that is running the server and the port on which the server is listening for conenctions.The format is as follows:
DEF VsServer Info { string "ServerMachine:serverPort" }
The ServerMachine should be the full internet name of the machine either as an ascii name, eg fred.research.sony.com or as an IP address, eg 123.231.12.1
The port number id the number that you choose when starting the server as discussed above.
So for example, the entire string might look like this:
DEF VsServer Info { string "fred.research.sony.com:5126" }
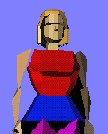
The avatar file
When Community Place connects to a server, it will tell the server the name of the avatar it is using. The server uses this information to tell other browsers which avatar to use to represent you when they meet you in Cyber Space. You don't need to worry about the details at this moment. All you need to do is ensure that an avatar VRML file is available to the Community Place browser when it loads your world.Browser versions 2beta1a and 2beta2 have different ways of handling avatar management. So, you need to read the instructions for the browser you expect to be viewing this world. If you're unsure about which browser you have, pull down the help menu in the browser and it will tell you.
For Community Place 2beta1a browser users
Community Place allows you to choose between two avatars, they are know as boy and girl. You can click links with the right button and select menu "Save Link As" to get these two avatar files from below,
Then you should copy these files into the same directory as your VRML file.
The browser will take care of the rest, when a user loads your VRML file, the browser will automatically look in the same directory for the person,boy, girl VRML files.
So, in conclusion; to allow people to share your VRML file. Start the server running, add the VsServer info node to your VRML file, and place the files person.wrl, boy.wrl and girl.wrl in the same directory as your VRML file.
After that, all you need to do is tell people to load the world you've created and they will automatically connect to your server.
For Community Place 2beta2 browser users
When Community Place read your world file, it will search in the directory where you placed the world file, and look for the directory avtimg where it expects to find the image files for avatars. Image files are used to display a small avatar icon in the avatar choice menu in the browser.Because of the difference in avatar management, you cannot see another avatar properly if he is using a different browser version from yours.So, you have to make avtimg directory aside your world file, and place following files in avtimg directory.
Now you can select an avatar from Browser menu. When you select one of avatars Browser will look for avtwrl directory where the actual model files for the avatar are kept.
So, you also have to make an avtwrl directory and place the following files in avtwrl directory.
So, in conclusion; to allow people to share your VRML file. Start the server running, add the VsServer info node to your VRML file, and make avtwrl, avtimg directories and put the necessary files in it.
After that all you need to do is tell people to load the world you've created and they will automatically connect to your server.
We've provided these two avatars for you to use to get started, of course, you can set up any avatars you like for your users. The browser doesn't care. Feel free to edit or replace boy and girl.
Lastly, a note on where you serve your world and avatar files from. There are two approaches:
- In one approach, you package up the world, avatar files, and
any sound and script files using some sort of archive utility. You
place this on your web server and you let people download it. They
then extract the files to their local disk. They then load the files
from their local disk and connect to your Bureau server.
- A second approach is to keep the files on the web server and
allow people to load them dynamically. In this case, they will
download your file from the web server, connect to your Bureau server,
and then when they disconnect, the file will be lost. Next time they
want to join your world, they will go back to your web server and
reload the file. This is the same approach most people are familiar
with for HTML docs.
Testing the server
To test that the server is running ok, do all of the above and then
start two Community Place browsers yourself. These browser should load
your VRML file. If everything has been done ok, then the two browsers
will connect to the server and you will be able to see each other.
After that, all you need to do is tell users about the location of your new world and when they download and connect they too will share.
Problems
There are several things that can go wrong, here's a few common mistakes.
- When you first test the world and the server with 2 browsers
on the same machine as the server:
- if the browser fails to connect to the server, then either the server isn't running, or you've got the addres:port wrong. You will know you've connected because an info window will pop up saying the browser has connected, and the status panel of the server will register the new connection.
- if you connect but don't see the other avatar, firstly make sure both browsers are viewing the same part of the scene, for performance reasons the server only tells one browser about other users in the same area. If you navigate both browsers to the same location and you don't see each other, then it's possible that you've forgotton to place the avatar files.
- When you test the browser and the server on different machines:
- if the browser fails to connect, then it's possible that your server machine is not reachable from your browser machine. This is a network configuration problem and may need a system administrator to help out. The server needs to be run on a machine that is accessible to the client machine. The client can run through a firewall but will not find a server hidden behind another firewall.
- If you know that the server is on an internet reachable (or is reachable from your client) machine then if you suspect that the client is behind a firewall, use the preferences panel in the pull down menu of the cyberpassage browser to tell the browser where the nearest socks host is.
Restrictions
There are a couple of restrictions with this release of the server. Firstly, it will expire on Oct.31. After which you will have to locate the next release. Secondly, the server is restricted to support a maximum of 12 connections. The publically accessible servers that we maintain to support the circus world etc allow many more connections. However these servers sit on larger machines on well connected nodes. Our experience has shown that most people who set up a PC server tend to do so on low powered machines with limited internet connections. In such a case overal system performance is poor ruining the experience for most users, hence the restriction.If you are interested in running a larger server, then please contact us.
Action panels
You may have noticed that our publically shared worlds, such as Circus
world, have an action panel. You can add these to your shared worlds
with a little extra work. Mainly it consists of copying and setting up
the required files in same directory as your source VRML1.0 file.
Shared Behaviours
Our scripting languages in this browser are TCL and Java. This is what
we use to create animated objects. The shared worlds like Sony
CircusPark contain active objects that are scripted using Java and a
set of simple shared behaviour extensions.
If you play around in the worlds we've created you'll notice some objects animate themselves without you clicking them. This is probably because they are shared among all browsers in the world and somebody else has clicked on the object. You can check this out by meeting a friend in Cyberspace, clicking an object and ask them if they see it animated.
If you know how to write E-VRML behaviors, or VRML2.0 Java behaviors, then you can use the Sony extensions to write shared behaviors.
If you are interested in running your own server to support your own shared world and wish to know how to build shared behaviours, then just contact us.


Home /
What's New /
What It's About /
Show-Off Gallery /
More
All contents Copyright (c) 1995 Sony Corporation.
Reproduction for personal use is permitted.
All other uses are prohibited without the formal authorization of
Sony Corporation.
Send your comments to vrmlmail@spiw.com